Fix: Taskbar Icons are Blank, Invisible, or Missing in Windows 10

Some users have recently reported that they encounter abnormal behavior when they start the Windows 10 operating system. There are cases when the Windows 10 taskbar logo become invisible, reappear randomly or go missing. If you are facing this issue, then you need to go through with this article to fix this issue.

How to solve Taskbar Icon Invisible Issue

  • Restart File Explorer
  • Clear Icon cache
  • Repining and Remove Taskbar icons
  • Turn off Tablet Mode
  • Troubleshoot in Clean Boot State
  • Updating Display Driver
  • Using File Association Fixer to fix JPG/PNG associations
  • Repair System Run SFC & Image using FixWin.

1) Restart File Explorer

You need to restart the explorer.exe process and then view if they help you. You need to launch the Task Manager for this situation.

2) Clear Icon cache

You can manually clear the icon, or you can also use the freeware “Thumbnail and Icon Cache Rebuilder” with a simple click.

3) Repining and Removing Taskbar Icons

Unpin or remove all the taskbar icon, and then you need to add this again freshly. After this process, you need to check the issue is resolved; if not, then follow another troubleshot that is given below.

4) Turn off Tablet Mode

If you are using Tablet mode on your device, then you need to turn off the Tablet Mode. Here all the open application does not rest on the taskbar.

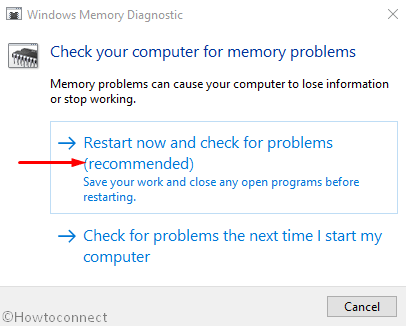
5)  Troubleshoot in Clean Boot State

Clean-boot troubleshoot is constructing to separate a performance issue. To run clean-boot troubleshooting, first, you need to complete several steps and then restart your computer after every command. Here you need to manually turn off any item another to try and then pinpoint the one that is causing the issue. When you have found the offender, you need to consider disabling and removing it.

6) Updating Display Driver

This might help or might not help you to fix this issue, but it is a good idea to update your Graphics driver and check the issue is resolved. You need to download and install the latest driver from the manufacturer’s official websites.

7) Using File Association Fixer to fix JPG/PNG associations

Again, this might not help you to fix this issue, but making a system restore point and then use it for Freeware “File Association Fixer” to restore and repair potentially damaged file associations. You can use it for JPG and PNG files only.

8) Repair System Run SFC & Image using FixWin.

Here you can download and install portable freeware “FixWin” to repair system pictures through the DISM, and you can also perform System File Checker with one tap.

Richard Branson is a self-professed security expert; he has been making the people aware of the security threats. His passion is to write about Cyber security, cryptography, malware, social engineering, internet and new media. He writes for Norton security products at norton.com/setup.

How to Block Inappropriate and Unsafe Websites on Windows 10

Nowadays, the internet is an essential tool where kids obtain information when they need to do their homework, learn a new topic, do assignments, play games, and connect with classmates and friends. However, italso comprises content that you don’t want your kids to see. If you have a Windows 10 operating system, then you can make a child account with parental control through Microsoft family settings. To turn on web filtering to secure your Family from unsafe or dominating websites that are not safe for your children.

1) How to Create a Child Account

  1. Launch the settings.
  2. Tap on Accounts.
  3. Hit the Family and other users.
  4. In Your Family option, tap on the “Add a Family member” option.
  5. Choose the “Add a child” button.
  6. Here you need to confirm the email ID of a young person that you want to add.
  7. Tap the “Next” option.
  8. Tap the “confirm” option.
  9. Tap on the “Close” option.

When you have complete the above steps, then you have created a standard account for your children. Now you need to add a new number that you have created to sign in rapidly. If you are not able to control your kids account, then tap on the “Join” option in the email invitation that sent to your registered mobile number.After tapping on the “Join” option, the new member can also tap on the sign-in option to follow the join family option to finish the enrollment.

2) How to Block a Website on Windows 10

  1. Launch the settings.
  2. Tap on Accounts.
  3. Hit the Family and other users.
  4. In Your Family option, tap on the “Manage family settings online” option.
  5. In the child account option, tap on the “More option’ menu.
  6. Choose the “Content restrictions” button.
  7. Enable the “Block inappropriate websites” switch.
  8. In the “Always allowed” option, attach a link for your website that you want to allow to, for example, Disney.com.
  9. Tap the + icon to confirm your change.
  10. Here you need to repeat steps 8 and 9 to attach another website on the list.
  11. You can also check “Only allow those website” features to block another website in the internet browser.
  12. In the “Always Blocked” option, you need to add a link on the website that you don’t wish to open by your child.
  13. Tap on the “+” option to confirm the link that you have added.
  14. Now here you have to repeat steps 12 and 13 to attach another website on the list.

Richard Branson is a creative person who has been writing blogs and articles about cybersecurity. She writes about the latest updates regarding mcafee.com/activate and how it can improve the work experience of users. Her articles have been published in many popular e-magazines, blogs, and websites.

How to Fix Skype Voicemail isn’t Working?

Skype is one of the best networking applications for video, audio, and messages but recently, many users are complaining that they could not send voicemail messages on Skype. If you are facing the same issue, then here are the instructions to solve the issue.

Source – https://remcafee.com/how-to-fix-skype-voicemail-isnt-working/

Check Call Forwarding is Turned On

  • First of all, you have to log in to the Skype account.
  • After that, reach the Manage features then click on the ‘Call forwarding and voicemail.’
  • Before proceeding, ensure that call forwarding is turned on.
  • Navigate to the profile image of Skype at the upper side of the screen to choose the Sign out option.
  • Finally, log in once more. It can guide to fix the problem with voice text problem and turn on voicemail.

Temporary Turn off Call Forwarding 

  • Firstly, you should log out of the Skype account.
  • After that, shut the Skype app on your system.
  • Then open the Skype link at ‘https://www.skype.com/en/.’
  • You should sign in to the account of Skype through My Account option on the site of Skype.
  • Thereafter, find the manage Features then click on the ‘Call forwarding and voicemail’ option.
  • You have to tick the option of Call forwarding to turn it off.
  • This process should be taken 5 minutes.
  • Later, sign out of the site of Skype.
  • Now, relaunch the Skype app and sign in to the account of Skype.

Modify the Privacy Settings 

  • Go to the Settings on Skype.
  • After that, select the Tools option and then click on the Options.
  • You should click on the Privacy option and then select the ‘Allow calls to my Skype Number(s).’
  • Then select the Anyone option.
  • Now, go to the Save button and click on it.
  • Finally, look at whether the issue is fixed or not.

Check the Skype Voicemail Setup

  • Navigate to the Skype Client screen on your system.
  • After that, you should sign in to Skype and then choose the Options.
  • You have to find the menu of Tools.
  • Now, beneath the menu, make sure that the option of ‘Receive unanswered calls as voice message’ is enabled or ticked.

Conclusion

Through the medium of this article, we will help the users to fix ‘Skype Voicemail isn’t Working’Error. We hope you will avail of this article and find it helpful. It is advisable to be aware while reading the article to avoid any mistakes while implementing these guidelines.

Richard Branson is a creative person who has been writing blogs and articles about cyber security. He writes about the latest updates regarding mcafee.com/activate and how it can improve the work experience of users. His articles have been published in many popular e-magazines, blogs and websites.

How to Fix 0x82d40004 Xbox One Error?

Xbox One is one of the leading gaming consoles in the world; however, there are several errors related to issues that can occur on it. Nowadays, it has been indulged in a new error known as 0x82d40004 that can ruin your gaming experience altogether.If you are facing any resembled error on your gaming console, then fix it through the below-written guideline.

Add the Xbox Account Again

In case you intend to add the Xbox account again, then you can opt to follow the below-mentioned guidelines.

Source- https://canorton.uk.net/how-to-fix-0x82d40004-xbox-one-error

  • First of all, you have to remove it from the console of Xbox.
  • To remove the account, select the Xbox and launch it.
  • After that, click on the system.
  • Navigate to the Settings option and click on it.
  • You have to select the Account option.
  • Then reach the Remove accounts option and select it.
  • Later, click on the account you would like to delete and select the Remove button.
  • Once removed, reach the Close button and click on it.

Add New Account

If the users are trying to add a new account, then they should carefully apply the given steps.

  • Navigate to the left-hand side of the screen of Xbox and click on the gamer image.
  • After that, select the ‘Add new’ option.
  • You should input the email ID you would like to add for the account of Microsoft and press the Enter button.
  • Reach the ‘Sign-In & Security Preference’ section and add the account of Microsoft.
  • Now, pursue the instructions to finish the log-in procedure and begin playing the game with the fresh account.

Set Power Mode to Instant-On

In case you intend to set the power mode to instant-on, then you can opt to follow the below-mentioned guidelines.

  • You should select the Xbox to launch it.
  • After that, reach the Settings option and select it.
  • Go to the ‘All Settings’ and click on it.
  • You should select the ‘General’ section.
  • Navigate to the option of ‘Power and startup’ and click on it.
  • Select the Power mode and adjust it to Instant-on through energy saving.
  • Once modified, easily execute reboot the console.

Move Console to Offline Mode

If the users are trying to move the console to offline mode, then they should carefully apply the given steps.

  • Go to the controller and click on the Xbox option to launch the menu.
  • After that, click on the Settings option.
  • You should select the Network option.
  • Navigate to the Network Settings option and click on it.
  • Go to the ‘Go Offline’ option and select it.

Reset the Console

In case you intend to reset the console, then you can opt to follow the below-mentioned guidelines.

  • You should click on the Xbox option to launch the Guide.
  • After that, go to the Settings option.
  • Reach the ‘All settings’ option and click on it.
  • You have to select the ‘System’ option and click on the ‘console info & updates’ option.
  • Go to the ‘Reset console’ option and select it.
  • You will be given two choices: ‘Reset and keep my games and apps’ and ‘Reset and remove everything.’
  • Navigate to the option of ‘Reset and keep my games and apps’ and wait for the procedure to get finished.

Remove the Persistent Space

If the users are trying to remove the persistent space, then they should carefully apply the given steps.

  • You should click on the Xbox option to launch the Guide.
  • Thereafter, click on the Settings option.
  • Go to the Console option.
  • Then click on the ‘Disc & Blu-ray’ option.
  • You have to select the ‘Persistent storage’ option.
  • Now, click on the option of ‘clear Persistent storage’ and wait for the procedure to get finished.

Richard Branson is a self-professed security expert; he has been making the people aware of the security threats. His passion is to write about Cyber security, cryptography, malware, social engineering, internet and new media. He writes for Norton security products at norton.com/setup.

How to Troubleshoot Printing Issues on Windows 10

Printers are used to perform various tasks in our day to day life. The printer prints various documents and forms easily and comfortably. Today printers are a vital part of the world of digital documents as everyone needs to print their documents for the proof in a hard copy.

Source- https://nortonnorton.uk/how-to-troubleshoot-printing-issues-on-windows-10/

Sometimes, users face various issues such as “Printer Driver Unavailable on Windows 10” and Printer “Can’t Print Documents.” It is an annoying error that a user faces while trying to print a particular document or file.  In some cases, this error comes with an error code that restricts your document from printing.

In case, you are engulfed in this problem, then below is the troubleshooting process that you can follow to troubleshoot your issue easily.

Resetting Firewall for Network Printers

The Firewall may block the IP address or port number if you have installed a network printer on your device. Firstly, search for the IP address of your printer by using the router and another system.

After that, you have to check that the IP address is not blocked from your system.

In case the IP address is blocked, then remove the particular issue, creating driver or infected data. You can also perform a reset function for resetting your Firewall.

Installing Printer Driver Again on your Device

This method is related to reinstalling printer drivers on your system. Users can download the same by visiting the reliable and authenticated site. You can also use the Device Manager for the same.

  • In the beginning, enter the keywords devmgmt.msc into the Run prompt and hit the Enter button.
  • After that, look for your printer’s name by navigating the Print listing.
  • Next, apply right click on your desired printer and then tap the Uninstall button.
  • Reboot your system. Your windows will automatically execute for installing the driver one more on your device.
  • Your system will automatically scan for the Windows Update Service and install the driver by visiting the Official and authenticated site.

Fixing the issue by using MS Driver

It is always recommended to download an authenticated and reliable driver, especially from Microsoft, as it is authenticated and registered with Microsoft Corporations.

  • First and foremost, launch Device Manager by inserting the keywords “devmgmt—msc” into the Run prompt box.
  • Then, search for the best resulting option and apply the right click.
  • Hit the Update Driver option by navigating the menu option.
  • Then browse the list manually for your preferred option.
  • Go to the upcoming screen and hit the option “Let me pick from a list of available drivers on my computer.”
  • Next, select the generic named driver there.
  • Now, install your driver, and make sure that it is working properly.

Installing the Driver under Compatibility State

Visit the Original Equipment Manufacturer’s site and then install your preferred printer driver under compatibility mode as sometimes, compatibility issues restrict the driver from installing on your device. For this action, it is advised to pursue these instructions:

  • First and foremost, go to the system setup file and right-click on it.
  • Then, press the “Properties” option to get selected.
  • Navigate to the section “Compatibility” and hit on it.
  • Now, try to fix the issue by running the compatibility troubleshooting tool. If it doesn’t work smoothly, then mark the box located just after the option “Run this program under Compatibility Mode.”
  • Then, make changes to your system by tapping the Apply button.
  • Install the driver and see whether the printer issue is resolved successfully on your device.

Troubleshooting Steps in Case of Old Printer

If you have an old printer and is flashing issues or not responding, then abide by these offered steps to fix the issue:

  • At the start, navigate to the Settings page.
  • Now, hit the option “Printers and Scanners.”
  • After that, hit the option “Add a printer or scanner” tab.
  • A link will show up over your system screen, saying that my printer is older one and assist me in searching it on my system.
  • Then, your system will scan for older printers and fetch your associated results.

The update system of Microsoft regulates large databases related to your drivers. It will automatically install the drivers smoothly.

Ricky Smith  is a technology enthusiast who loves writing about new advancements and IT threats on a regular basis. Her work focuses on the latest advancements in the realm of technology, social media, and cyber security at norton.com/setup.

How To Watch FuboTV On Roku?

Roku is one of the leading streaming device makers, and thus there are numerous new features that it keep on introducing. One of its latest ventures is FuboTV, and in the blog, we will discuss how to watch it on Roku.

Download the FuboTV Application

In case you intend to download the FuboTV application, then you can opt to follow the below-mentioned guidelines.

Source- https://canorton.uk.net/how-to-watch-fubotv-on-roku

  • First of all, turn on the Roku device.
  • After that, reach the Home page and choose the Search button and hit the OK button on the RC.
  • You should input ‘FuboTV’ into it and hit on the right-hand side of the RC.
  • Then go to the ‘FuboTV channel’ and select it.
  • You should also select the URL and hit the ‘Add Channel’ option to add FuboTV to the Roku online.
  • When you have chosen FuboTV channel on the screen, hit the right-hand side arrow on your remote many times unless you locate the option Add Channel.
  • You have to choose the Add Channel and verify it with the OK button.
  • FuboTV channel will install automatically. 
  • In case the setup finishes, hit the OK button to verify the addition of this channel.
  • Either select return to the Home screen or Go to Channel.
  • Now, spotlight the FuboTV and hit the OK button on the Roku remote to begin the channel.

Register for FuboTV

If the users are trying to register for FuboTV, then they should carefully apply the given steps.

  • Navigate to the Roku and open the FuboTV channel.
  • After that, select the ‘Start Free Trial’ option, whether you are a fresh user or login in case you are a subscriber.
  • Hit on the Allow option in the prompt screen. You will connect the Roku account with FuboTV. 
  • In case you would like to use a different email account, select the Cancel button.
  • You should input different email (alternate), password, and zip code. Our recommendation is to set a difficult password and note it somewhere. 
  • Then hit on the Next option.
  • You will check the subscription options on another screen.
  • Hit the ‘View All Channels’ to search the appropriate channels list. 
  • When you are done, select the ‘Let’s Go option.
  • Later, input the passcode of Roku and hit on the Subscribe button.
  • Finally, verify the notification about the subscription with the OK button.

Register FuboTV Website

In case you intend to register the FuboTV website, then you can opt to follow the below-mentioned guidelines.

  • Firstly, launch the browser and go to the FuboTV register page.
  • After that, input the zip code into it.
  • Thereafter, input the email ID and password. 
  • You should also register through Facebook or Google.
  • Then select the ‘Go to Next Step’ option.
  • Go to the FuboTV package you would like to.
  • You have to select the ‘Go to the Next Step’ option.
  • Then add a few additional features if you want, the instruction is alternative.
  • Select the ‘Go to Final Step’ option.
  • Later, input the CC information.
  • Now, select the ‘Start Watching FuboTV’ button.

Richard Branson is a self-professed security expert; he has been making the people aware of the security threats. His passion is to write about Cyber security, cryptography, malware, social engineering, internet and new media. He writes for Norton security products at norton.com/setup.

How to Fix REFS_FILE_SYSTEM Error BSOD Windows 10?

Blue Screen of Death or BSOD errors are one of the most prevalent errors in the Windows system. One prominent example of BSOD errors are the REFS_FILE_SYSTEM error. It is also seen as 0x00000149, and we will show how it can be fixed. So, here are the instructions to solve the error.

Turn off Automatic Windows 10 Reboot

In case you intend to turn off automatic Windows 10 reboot, then you can opt to follow the below-mentioned guidelines.

Source- https://nortonnorton.uk/how-to-fix-refs_file_system-error-bsod-windows-10/

  • Hold the Win + D keys at the same time on your system to reach the Desktop area.
  • Then click on the This PC option.
  • After that, select the Properties option from the showing menu.
  • In case the PC screen unrolls, choose the Advanced system settings URL lying on the left-hand side of the screen.
  • You will see a pop-up screen of System Properties.
  • Go to the Advanced section.
  • Reach the recent section, go to the Startup and Recovery area and select the Settings option.
  • After appearing another wizard, reach the System failure section.
  • Finally, click on the OK button from the end of the screen to apply the changes.

Upgrade all the Drivers in Device Manager Platform

If the users are trying to upgrade all the drivers in the device manager platform, then they should carefully apply the given steps.

  • Go to the Start button and right-click on it, then choose the Device Manager from the options list.
  • Check out the console properly and attempt locating out any sign of exclamation in any device.
  • In case you locate any, spread out the similar by selecting it.
  • Upon expanding the list of drivers.
  • After detecting, do a right-click on those in the procedure.
  • Now, choose the ‘Update driver’ option and allow the Windows to begin upgrading.

Load the Basic Procedures only by Booting Windows in Safe Mode

In case you intend to load the basic procedures only by booting Windows in Safe Mode, then you can opt to follow the below-mentioned guidelines.

  • Reach the Start menu by clicking on the button situated at the lower-left corner of the screen.
  • After that, input ‘msconfig’ into it and hit the Enter key.
  • In case ‘System Configuration’ appears in the outcome, choose it to open.
  • In the showing screen next, move among tans and reach Boot options.
  • Locate and select the second half titled as Boot options.
  • Tick the box of ‘Safe Boot.’
  • Click on the Apply option and then select the OK button.
  • After changing are applied, then leave these sections.
  • Launch the Start menu once more in a similar method prior.
  • Go to the power Cog and select it and choose the Restart option.
  • Windows will ready for the restarting initially.
  • After booting the startup, once finish the cycle of the reboot, begin holding the F8 key frequently.
  • If you come throughout the following screen, click on the Safe Boot options situated in the Advanced boot options.
  • Now, access the Safe Boot Mode in consequent instruction.

Uninstall Same Programs

If the users are trying to uninstall the same programs, then they should carefully apply the given steps.

  • Hold the Win + I keys at the same time on your system to launch the Settings application.
  • In the App home screen, select the Apps and go forward to the next screen.
  • After reaching the following screen, choose the Apps and features option from the left-hand side panel.
  • Go to the right-hand side and check for similar software in the installed apps list.
  • You should click on every program and select the Uninstall option from the expanded panel.
  • If UAC asks for authorization, select the Yes button to offer consent.
  • Pursue on-screen steps to delete the software properly.
  • In case the procedure gets over, reboot the system.
  • You should look for the error in the PC if login again.
  • In case nothing shows ahead, you should install the deleted application if required.

Identify and Dismiss Threats in Windows Security

In case you intend to identify and dismiss threats in Windows security, then you can opt to follow the below-mentioned guidelines.

  • Go to the right-hand side of Taskbar and select the ‘Show hidden’ buttons.
  • If the menu brings up, choose the Shield button and allow Windows Security to launch it on a particular screen.
  • Select the ‘Virus and threat protection.’
  • Reach the parallel right-hand side, click on the URL entitled with Scan Options.
  • After showing, select the radio option ahead of Full scan from there.
  • You should click on the Scan Now option to start detecting.
  • In case the procedures finish, you will view the result about malware and threats on display. 
  • Now, select the Clean threats if the tool traces out a few viruses.
  • Going ahead to the next screen, three choices will be there. Delete and at once; select the Start action options to dismiss them from the system.

Perform SFC in Elevated Command Prompt to recover missing resources

If the users are trying to perform SFC in elevated command prompt to recover missing resources, then they should carefully apply the given steps.

  • Hold the Win + S keys at the same time on your system to launch the Taskbar search.
  • After that, input ‘cmd.exe’ into it and hit the Enter key.
  • In case the result brings up, reach the Command Prompt, and right-click on it.
  • You should select the Run as Administrator from the menu.
  • After UAC asking the permission to create modification and select the Yes option to offer consent.
  • Reach the black screen and input ‘sfc /scannow’ once the cursor blink.
  • Hit the Enter key and allow SFC to take action.
  • This procedure will identify and solve the PC file corruption automatically.
  • The procedure will take more time, so you have to wait for it to finish.
  • Then restart the system after finishing the process.
  • In case you getting back again, carry out a look for the happens of the Blue screen of death error.

Ricky Smith  is a technology enthusiast who loves writing about new advancements and IT threats on a regular basis. Her work focuses on the latest advancements in the realm of technology, social media, and cyber security at norton.com/setup.

How to Fix Computer Not Turning On (Easy Fixes)

It can put your mood in the wrong place if you press the power button on your device and it doesn’t turn on. There can be many reasons behind it, but the usual symptom of “Nothing is working” is tiny to proceed. So you have to divide the whole procedure into two following simple steps:

Source- https://canorton.uk.net/how-to-fix-computer-not-turning-on-easy-fixes/

  • Try to know about the problem by observing the symptoms and your situation.
  • Based on the possibilities, select the optimum troubleshooting technique.

Note: Mentioned troubleshooting techniques can be applied to any Windows

Files are Safe (Most Probably)

General fear that catches the users is regarding the loss of your data in these conditions. Generally, it happens because of some hardware problems, and in these conditions, the hard drive and its data are safe (until the problematic hardware is hard drive).

Tips, in this case, you should not try to be a hero until you know everything. So, come in contact with the customer service or contact the professional repairing person (who can tell you the exact way to fix the problem the cost).

No Signal of Power Consumption

If your device is not showing any power consumption signals (generally the power led light), then you can use these steps as the troubleshooting of the problem.

  • Try again to turn on the Device with slightly more pressure on the power button.
  • Check the connection of power cables, and then the wires and adaptor.
  • Make sure the power supplying point is working. You can use the Lamp test for that.
  • Make sure that the battery is not completely drained, connect laptops and pads to the direct power supply and try to turn it on.
  • Please remove the battery and re-attach it.

Power on for a while and turn off after some time

When you turn on the device, it turns on for a blink of a moment, then turns off. In this condition, you have to follow the following steps:

  • Make sure that the voltage of the power supply is sufficient.
  • Your device is cool because it can happen because of overheating too.
  • You also can check for any electrical short on the device.
  • If there is a beep sound, then try to hear how many are there. If there is only one beep, then there is not too much trouble.

Power is on but No Activity in Computer

 When you turn on the computer, it turns on, but there is no display on the Screen. Then you can follow these steps:

  • Make sure that your monitor works properly.
  • Make sure the voltage of the current is sufficient for the computer.
  • Restart again, to make sure it’s not a glitch.
  • Try to clear the memory of BIOS to form the motherboard, which will lead the setting to default mode, because it can be the cause of the problem regarding the display.

Computer Reboots Continuously

  • When you press, the power button pc usually starts but keeps repeating the booting process in a repeated manner. Then you can try these steps:
  • Try to resolve the BIOS error message. These messages can be particular, mentioning the precise trouble code. Try to troubleshoot that issue, and if it doesn’t work, then worry not you are going back automatically.
  • If your PC is restarting from the point of where it has bootable data, then remove every USB optical drive or storage device.
  • Erase the CMOS, from which BIOS setting will reach the default level, and all misconfiguration will be eliminated.

James Walker is a self-professed security expert; he has been making the people aware of the security threats. His passion is to write about Cyber security, cryptography, malware, social engineering, internet and new media. He writes for Norton security products at norton.com/setup.

How to Use SteamVR with Windows Mixed Reality

The integrated Windows Mixed Reality with SteamVR is a form of bridging app that will let you explore the vast platform of Steam. The users will now fetch thousands of more games and apps along with many more experiences by this special union. Windows Mixed Reality was the progressed extension of Windows 10 which was planned to offer a consolidated ecosystem for various augmented reality devices and virtual reality devices. Here is the simple guide to the users who wanted to access the world of VR and waiting for the tips eagerly:-

Source- https://canorton.uk.net/how-to-use-steamvr-with-windows-mixed-reality/

The users have to update Windows 10 on their PCs and to do this they can follow the simple tips given below:-

First of all, the users are advised to go to the Steam store and search for the Windows Mixed Reality along with the SteamVR app.
Now, you need to click on the option Free and then click on Next.
The above steps will update your Windows 10 along with installing the app.
Way Foreword For Fetching SteamVR Via Windows Mixed Reality

The users will need to plug their headset of WMR into their PC along with turning on their motion controllers to begin the process.
Then after, You don’t need to put on the headset and launch the Steam once the portal of WMR is loaded.
The users need to follow the launch procedure of the portal of WMR manually if it fails to load itself.
You can go to the Start menu on desktop or toolbar to launch the portal of WMR.
The users can launch the VR app via Steam and then enjoy it by putting on the headset.
If you want to access SteamVR, then you can move within your WMR headset and can add the app of the desktop to the wall alongside the cliff house and proceed to navigate.
Way Foreword to use the Windows Mixed Reality motion controllers with SteamVR

The users will have some difference from title to the title while using they will start using their SteamVR with WMR motion controllers with If there will be no availability of any official support, then it may become more concerning. However, there are still some standard guidelines that could be used for getting the advantage of WMR motion controllers for SteamVR. The users can get the guidelines by going through the nifty diagram created by SteamVR which exactly shows the way to use the WMR Reality motion controllers with SteamVR.

The users can play thousands of SteamVR games by connecting their headset to their PCs and you can get started by opening the Steam dashboard. Further, the users need to press down on the left thumbstick. If the users wanted to exit the SteamVR game then they can press down the Windows button to return to the Windows Mixed Reality homepage. They will need to select and tap on the Mixed Reality home that appeared to them on the screen.

The users may find some problems while going through the whole process in such case, they can follow the below-given guidelines for troubleshooting:-

If the controllers are not working properly in your SteamVR game

To resolve the issue, the users need to close the SteamVR game they are using and then you have to learn more about the controllers.

If your game is running slowly, then you need to check if your PC is fulfilling the requirements for playing the game. You can further choose the option Pause to click on it to stop the desktop preview in the Mixed Reality Portal.

Richard Branson is a self-professed security expert; he has been making the people aware of the security threats. His passion is to write about Cyber security, cryptography, malware, social engineering, internet and new media. He writes for Norton security products at norton.com/setup.

How to Connect and Watch your iPad Videos on a TV

It’s okay to watch movies and videos on your iPad while traveling or on the go. But, the real pleasure of watching movies comes on a big screen. Most of the users prefer watching their favorite TV shows and movies on a widescreen. If you have some great videos on your iPad and want to watch them on a TV, then you’ve more than one way to do so. If you have an Apple TV, then this becomes, even more easier with AirPlay.

How to watch iPad videos on an Apple TV

Things you require:

  • iPad 2 or later
  • Apple TV 2nd generation or later
  • A Wi-Fi network

If you’ve all these things, then you can easily set up and use AirPlay to watch videos from your iPad. Make sure the devices you’re using are up to date.

  1. Verify that the Apple TV you’re going to use is set up correctly.
  2. After that, power on your devices. If you’re using Apple TV with another TV, then you’ll need to change the TV’s input to the input Apple TV is connected with.
  3. Now, take your iPad and open the TV app. If the video you want to play is stored in the Photos, then tap on the ‘Photos’ app.
  4. Go to the ‘Library’ app section from the bottom. Or, open ‘Video’ album in Photos.
  5. Look for the video you want to watch on your TV and select it.
  6. Tap on the ‘Play’ option if you’re in the TV app. This will start playing the video. Or, tap on the ‘Share’ icon at the bottom in Photos.
  7. Now, tap on the ‘AirPlay’ icon. You’ll see the AirPlay menu on your screen.
  8. Find your Apple TV’s name in the AirPlay menu. If you didn’t find your TV’s name in the menu, then verify that both of your devices are on the same Wi-Fi network.
  9. Tap on your Apple TV’s name, when you see it in the AirPlay menu.

Try this, if you aren’t able to play videos from AirPlay:

  • Open a video you want to watch on the TV.
  • Then, swipe up on the screen.
  • Select ‘Screen Mirroring.’
  • Then, choose your Apple TV.
  • Provide your TV code, when prompted.

Your selected video will now start playing on your Apple TV. Whenever you want to stop playing the video on TV, just tap the ‘AirPlay/Screen Mirroring’ icon again or disable the Wi-Fi of your iPad.

How to watch iPad videos on a TV with an HDMI-to-iPad adapter

Things you required:

  • HDMI-to-iPad adapter
  • An HDMI cable

It is a Digital AV Adapter provided by Apple, which connects an iPad to Apple TV. It has a plug on one side that can connect to the charging port of your iPad and an HDMI port on the other side. This means, to connect your device through this way, you’ll also require an HDMI cable.

Note: In case your TV does not support the HDMI connection, then you have to use an HDMI-to-RCA adapter.

Here is how to connect your iPad to a TV with an HDMI-to-iPad adapter.

  1. Take the adapter and insert its plug into the iPad’s charging port.
  2. Take an HDMI cable and insert its one end into the adapter’s HDMI port.
  3. Now, connect your iPad to the TV with the other end of the HDMI cable.
  4. Start your TV.
  5. Change the TV’s input to the input you’ve connected your iPad through the HDMI cable.
  6. After switching your TV to the right input, hold your iPad and play any video you want to watch on the TV.

How to watch iPad videos on a TV with Smart TV apps

Things you required:

  • Streaming app
  • A Wi-Fi network

With this method, you can watch your iPod Videos wirelessly on your TV. You just require a Wi-Fi network to connect your iPad and TV and a streaming app to stream your iPad’s screen. You can use iMediaShare or any other streaming app you want.

  1. First of all, download the streaming app you want to use.
  2. Then, connect your iPad and TV to a Wi-Fi network.
  3. Now, open the streaming app on your iPad.
  4. Select what you want to watch on your TV screen.
  5. Choose your TV from the available devices list.

Done! Your iPad’s screen will now appear on the TV screen.

John Track is a self-professed security expert; he has been making the people aware of the security threats. His passion is to write about Cyber security, cryptography, malware, social engineering, internet and new media. He writes for Norton security products at norton.com/setup.

Design a site like this with WordPress.com
Get started